


How to Check Christmas Lights: Everything You Need to Know
The holiday season brings joy, warmth, and beautiful displays of Christmas lights. But before you string up those festive bulbs, it's crucial to check your Christmas lights for safety and functionality. Whether you're using lights from last year or setting up new displays, proper inspection can prevent electrical hazards, extend the life of your lights, and ensure your holiday decorations shine bright all season long.
In this comprehensive guide, we'll walk you through everything you need to know about checking Christmas lights safely and effectively.
Why checking Christmas lights matters
Christmas lights might seem simple, but they're electrical devices that require proper inspection before use. According to the National Fire Protection Association, electrical issues cause an average of 160 home fires during the holiday season. Many of these incidents could be prevented with proper light inspection and maintenance.
Checking your Christmas lights serves several important purposes:
Safety first: Damaged wires, loose connections, or broken bulbs can create fire hazards or electrical shock risks. A thorough inspection helps identify these dangers before they become serious problems.
Cost savings: Identifying issues early can help you repair lights rather than replace entire strings. This approach saves money and reduces waste.
Better performance: Well-maintained lights provide consistent illumination and are less likely to fail mid-season, keeping your displays looking their best.
Extended lifespan: Regular inspection and maintenance can significantly extend the life of your Christmas lights, making them a better long-term investment.
Essential tools for checking Christmas lights
Before you begin inspecting your lights, gather these helpful tools:
Light tester or multimeter: For checking individual bulbs and electrical continuity
Replacement bulbs: Keep extras on hand for immediate repairs
Small screwdriver: For adjusting loose connections
Electrical tape: For minor wire repairs
Extension cord: For testing lights before installation
Good lighting: Work in a well-lit area to spot damage clearly

Step-by-step guide to checking Christmas lights
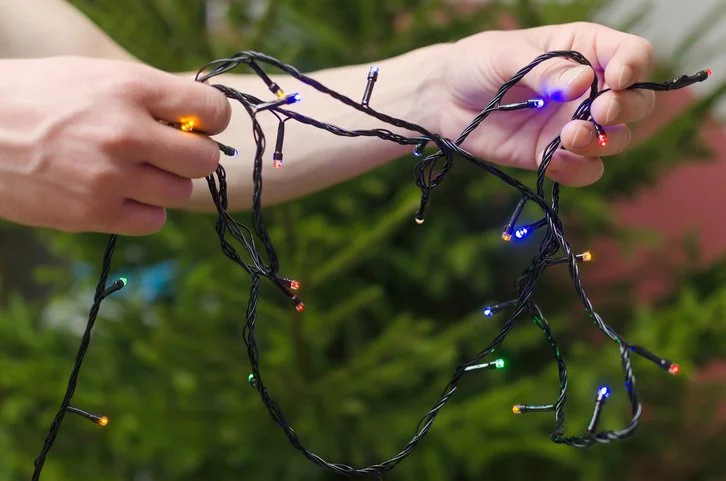
Step 1: Visual inspection
Start with a thorough visual examination of your light strings. Look for these potential issues:
Wire condition: Check the entire length of the wire for cracks, fraying, cuts, or exposed copper. Pay special attention to areas near plugs and where wires bend frequently.
Plug integrity: Examine plugs for cracks, loose prongs, or signs of overheating, like discoloration or melting.
Bulb status: Look for cracked, broken, or missing bulbs. Even one damaged bulb can affect an entire string.
Connection points: Check where sections connect together, looking for loose or corroded connections.
Sockets: Inspect lamp sockets for cracks, corrosion, or loose connections.
Step 2: Pre-testing preparation
Before plugging in your lights, take these safety precautions:
Work in dry conditions: Never test lights in wet conditions or with wet hands.
Check your testing area: Ensure you're working in a safe space away from water and with adequate lighting.
Have replacements ready: Keep spare bulbs and fuses nearby for immediate repairs.
Step 3: Initial power test
Plug your light string into a working outlet and observe:
Complete illumination: All bulbs should light up immediately. Note any sections that remain dark.
Consistent brightness: All bulbs should glow with similar intensity.
Steady operation: Lights should remain stable without flickering or dimming.
No unusual sounds: Listen for buzzing, crackling, or other electrical sounds that might indicate problems.
Step 4: Individual bulb testing
For lights that aren't working properly, test individual bulbs:
Remove suspect bulbs: Gently twist counterclockwise to remove bulbs that aren't lighting.
Visual bulb inspection: Look for darkened or broken filaments inside the bulb.
Test with a multimeter: If you have one, use a multimeter to check bulb continuity.
Replace as needed: Install new bulbs and retest the string.
Step 5: Fuse inspection
Many Christmas light strings include fuses in the plug. Check these important safety components:
Locate the fuse compartment: It is usually found in the male plug end, often behind a small sliding door.
Remove fuses carefully: Use a small screwdriver to gently pry out the fuse.
Visual fuse check: Look for darkened glass or broken filaments inside the fuse.
Test fuse continuity: Use a multimeter to verify the fuse is working properly.
Replace blown fuses: Install new fuses with the same amperage rating.
Common Christmas light problems and solutions

Problem: The entire string won't light
Possible causes:
Blown fuse in the plug
Faulty outlet or circuit breaker
Damaged plug or cord
Solutions:
Check and replace fuses
Test the outlet with another device
Inspect the plug for damage and replace it if necessary
Problem: A section of lights won't work
Possible causes:
One or more burned-out bulbs (in series wiring)
Loose bulb connections
Damaged wire in that section
Solutions:
Systematically replace bulbs in the dark section
Ensure all bulbs are properly seated
Check for wire damage and repair with electrical tape if minor
Problem: Lights flicker or dim
Possible causes:
Loose connections
Overloaded circuit
Aging bulbs
Solutions:
Tighten all connections
Reduce load on the circuit
Replace old or dim bulbs

Problem: Individual bulbs burn out quickly
Possible causes:
Voltage fluctuations
Poor quality bulbs
Moisture in sockets
Solutions:
Use voltage regulators if necessary
Invest in higher-quality replacement bulbs
Ensure sockets are dry and properly sealed
Safety considerations when checking Christmas lights
Electrical safety
Turn off power: Always unplug lights before making repairs or adjustments.
Dry conditions only: Never work with Christmas lights in wet conditions or with wet hands.
Proper grounding: Ensure outdoor outlets are properly grounded and equipped with GFCI protection.
Load limits: Don't exceed manufacturer recommendations for connecting multiple strings.
Fire prevention
Heat awareness: Check for excessive heat in plugs, wires, or bulb sockets during operation.
Proper ventilation: Ensure adequate air circulation around electrical connections.
No overloading: Avoid connecting too many light strings to a single circuit.
Regular monitoring: Periodically check lights during use for signs of overheating.
Physical safety
Stable positioning: When testing, ensure lights are on stable surfaces and won't fall.
Sharp edges: Be careful of broken glass from damaged bulbs.
Ladder safety: If testing involves height, follow proper ladder safety procedures.
When to replace vs. repair Christmas lights
Repair when:
Only a few bulbs are burned out
Minor wire damage in non-critical areas
Blown fuses with otherwise good condition
Loose connections that can be tightened
Replace when:
Extensive wire damage or multiple cuts
Repeated bulb failures in the same string
Damaged plugs or sockets
The lights are more than 10 years old
Cost of repairs approaches replacement cost
Storing Christmas lights properly
Proper storage prevents many issues and extends light lifespan:
Clean before storage: Remove any dirt, debris, or moisture from lights.
Organize carefully: Wind lights around cardboard tubes or special storage reels to prevent tangling and wire damage.
Climate control: Store in a dry, temperature-controlled environment when possible.
Protect from pests: Seal storage containers to prevent rodent damage to wires.
Label and inventory: Keep track of which lights are working and which need attention next year.
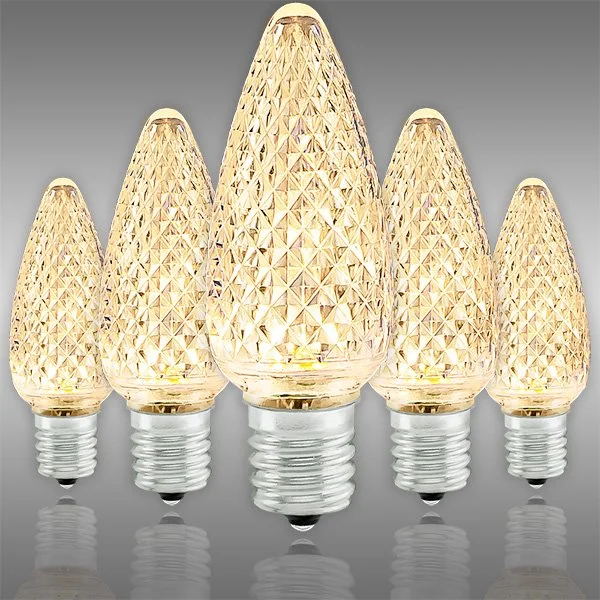
Upgrading to LED Christmas lights
If your traditional incandescent lights are showing signs of age, consider upgrading to LED Christmas lights:
Energy efficiency: LED lights use up to 90% less energy than incandescent bulbs.
Longer lifespan: Quality LED Christmas lights can last 25,000 to 50,000 hours.
Cooler operation: LEDs generate less heat, reducing fire risk and energy waste.
Durability: LED bulbs are more resistant to breakage and weather damage.
Better performance: Many LED options offer consistent brightness and color throughout their lifespan.
Professional help and when to seek it
While many Christmas light issues can be resolved with basic troubleshooting, some situations require professional attention:
Electrical concerns: If you're uncomfortable working with electrical components or suspect wiring issues.
Repeated problems: When the same issues keep occurring despite proper repairs.
Large displays: For extensive commercial or residential displays that require complex installations.
Safety doubts: Whenever you're unsure about the safety of your lighting setup.
Maintaining your Christmas lights throughout the season
Regular maintenance during use helps ensure safe, reliable operation:
Weekly inspections: Check lights weekly for new damage or issues.
Weather monitoring: Inspect lights after storms or severe weather.
Connection security: Periodically verify that all connections remain tight and secure.
Performance observation: Watch for changes in brightness, flickering, or other performance issues.
From troubleshooting to celebrating
Checking your Christmas lights properly is an essential step in creating safe, beautiful holiday displays. By following this comprehensive guide, you can identify potential issues early, make necessary repairs, and enjoy worry-free lighting throughout the season.
Remember, when in doubt, prioritize safety over decoration. If you encounter electrical issues beyond your comfort level or expertise, consult with lighting professionals or qualified electricians.
For high-quality replacement bulbs, professional-grade Christmas lights, and expert lighting advice, visit 1000Bulbs.com or call our US-based lighting experts at 1-855-204-0379. Our team is here to help you create safe, stunning holiday displays that bring joy to your celebration.
Frequently asked questions
How often should I check my Christmas lights?
Inspect stored lights before each season and check them weekly while in use. Always inspect after severe weather or if you notice any performance changes.
Can I repair Christmas lights with electrical tape?
Minor wire damage can be temporarily repaired with electrical tape, but significant damage requires professional repair or replacement of the light string.
Why do some bulbs burn out faster than others?
Bulb longevity depends on quality, voltage fluctuations, heat buildup, and environmental conditions. Higher-quality bulbs typically last longer and perform more consistently.
Is it safe to leave Christmas lights on overnight?
While many people do leave lights on overnight, the safest practice is to turn them off when unattended. Consider using timers for automatic control.
How many light strings can I connect together?
This varies by manufacturer and light type. Check the packaging for specific limits, but typically you shouldn't exceed three to five strings on a single circuit.
What's the difference between indoor and outdoor Christmas lights?
Outdoor lights are designed with weather-resistant materials and connections. Indoor lights should never be used outdoors as they lack proper weatherproofing.


