Spooktacular Halloween DIY Projects
Halloween is right around the corner. Soon your neighborhood will be teaming with all sorts of ghosts, goblins, and ghouls screaming for candy. Appease them by putting up spooky lights and ghoulish decorations fit for a nightmare. Here are some spooktacular DIY Halloween decoration ideas to help you get your creep on:
Witch Hat Lanterns
Have a few witch hats lying around from previous Halloween costumes? Turn them into decorative lanterns for your front porch in a matter of minutes. Suspend a light stick, glow stick, or battery operated tea light inside the hat using fishing line. Use another length of fishing line to hang the hat from the ceiling. If you need a brighter light, use green or purple LED mini light strings.

Spider Sacks
Make your webs stick out with some spider sacks made from old white tights, a tennis ball, and plastic black spiders of varying sizes. Cut off one of the legs of the tights. Next, wrap a tennis ball with a white cloth or paper towel. Stuff the covered ball into the leg, making sure that it is at the bottom. Add several spiders between the tights and ball so that it looks like spiders are inside. Using a glue gun, begin adding spiders to the outside of the sack. The heaviest concentration of spiders should be at the bottom, with the numbers thinning out the further you go up the sack. Once the glue is dry, your spider sack is ready to hang up.
Scarily Bright Ideas: For a neat glowing effect, wrap InvisiLite LED light strings around the ball and then cover that with cotton batting.

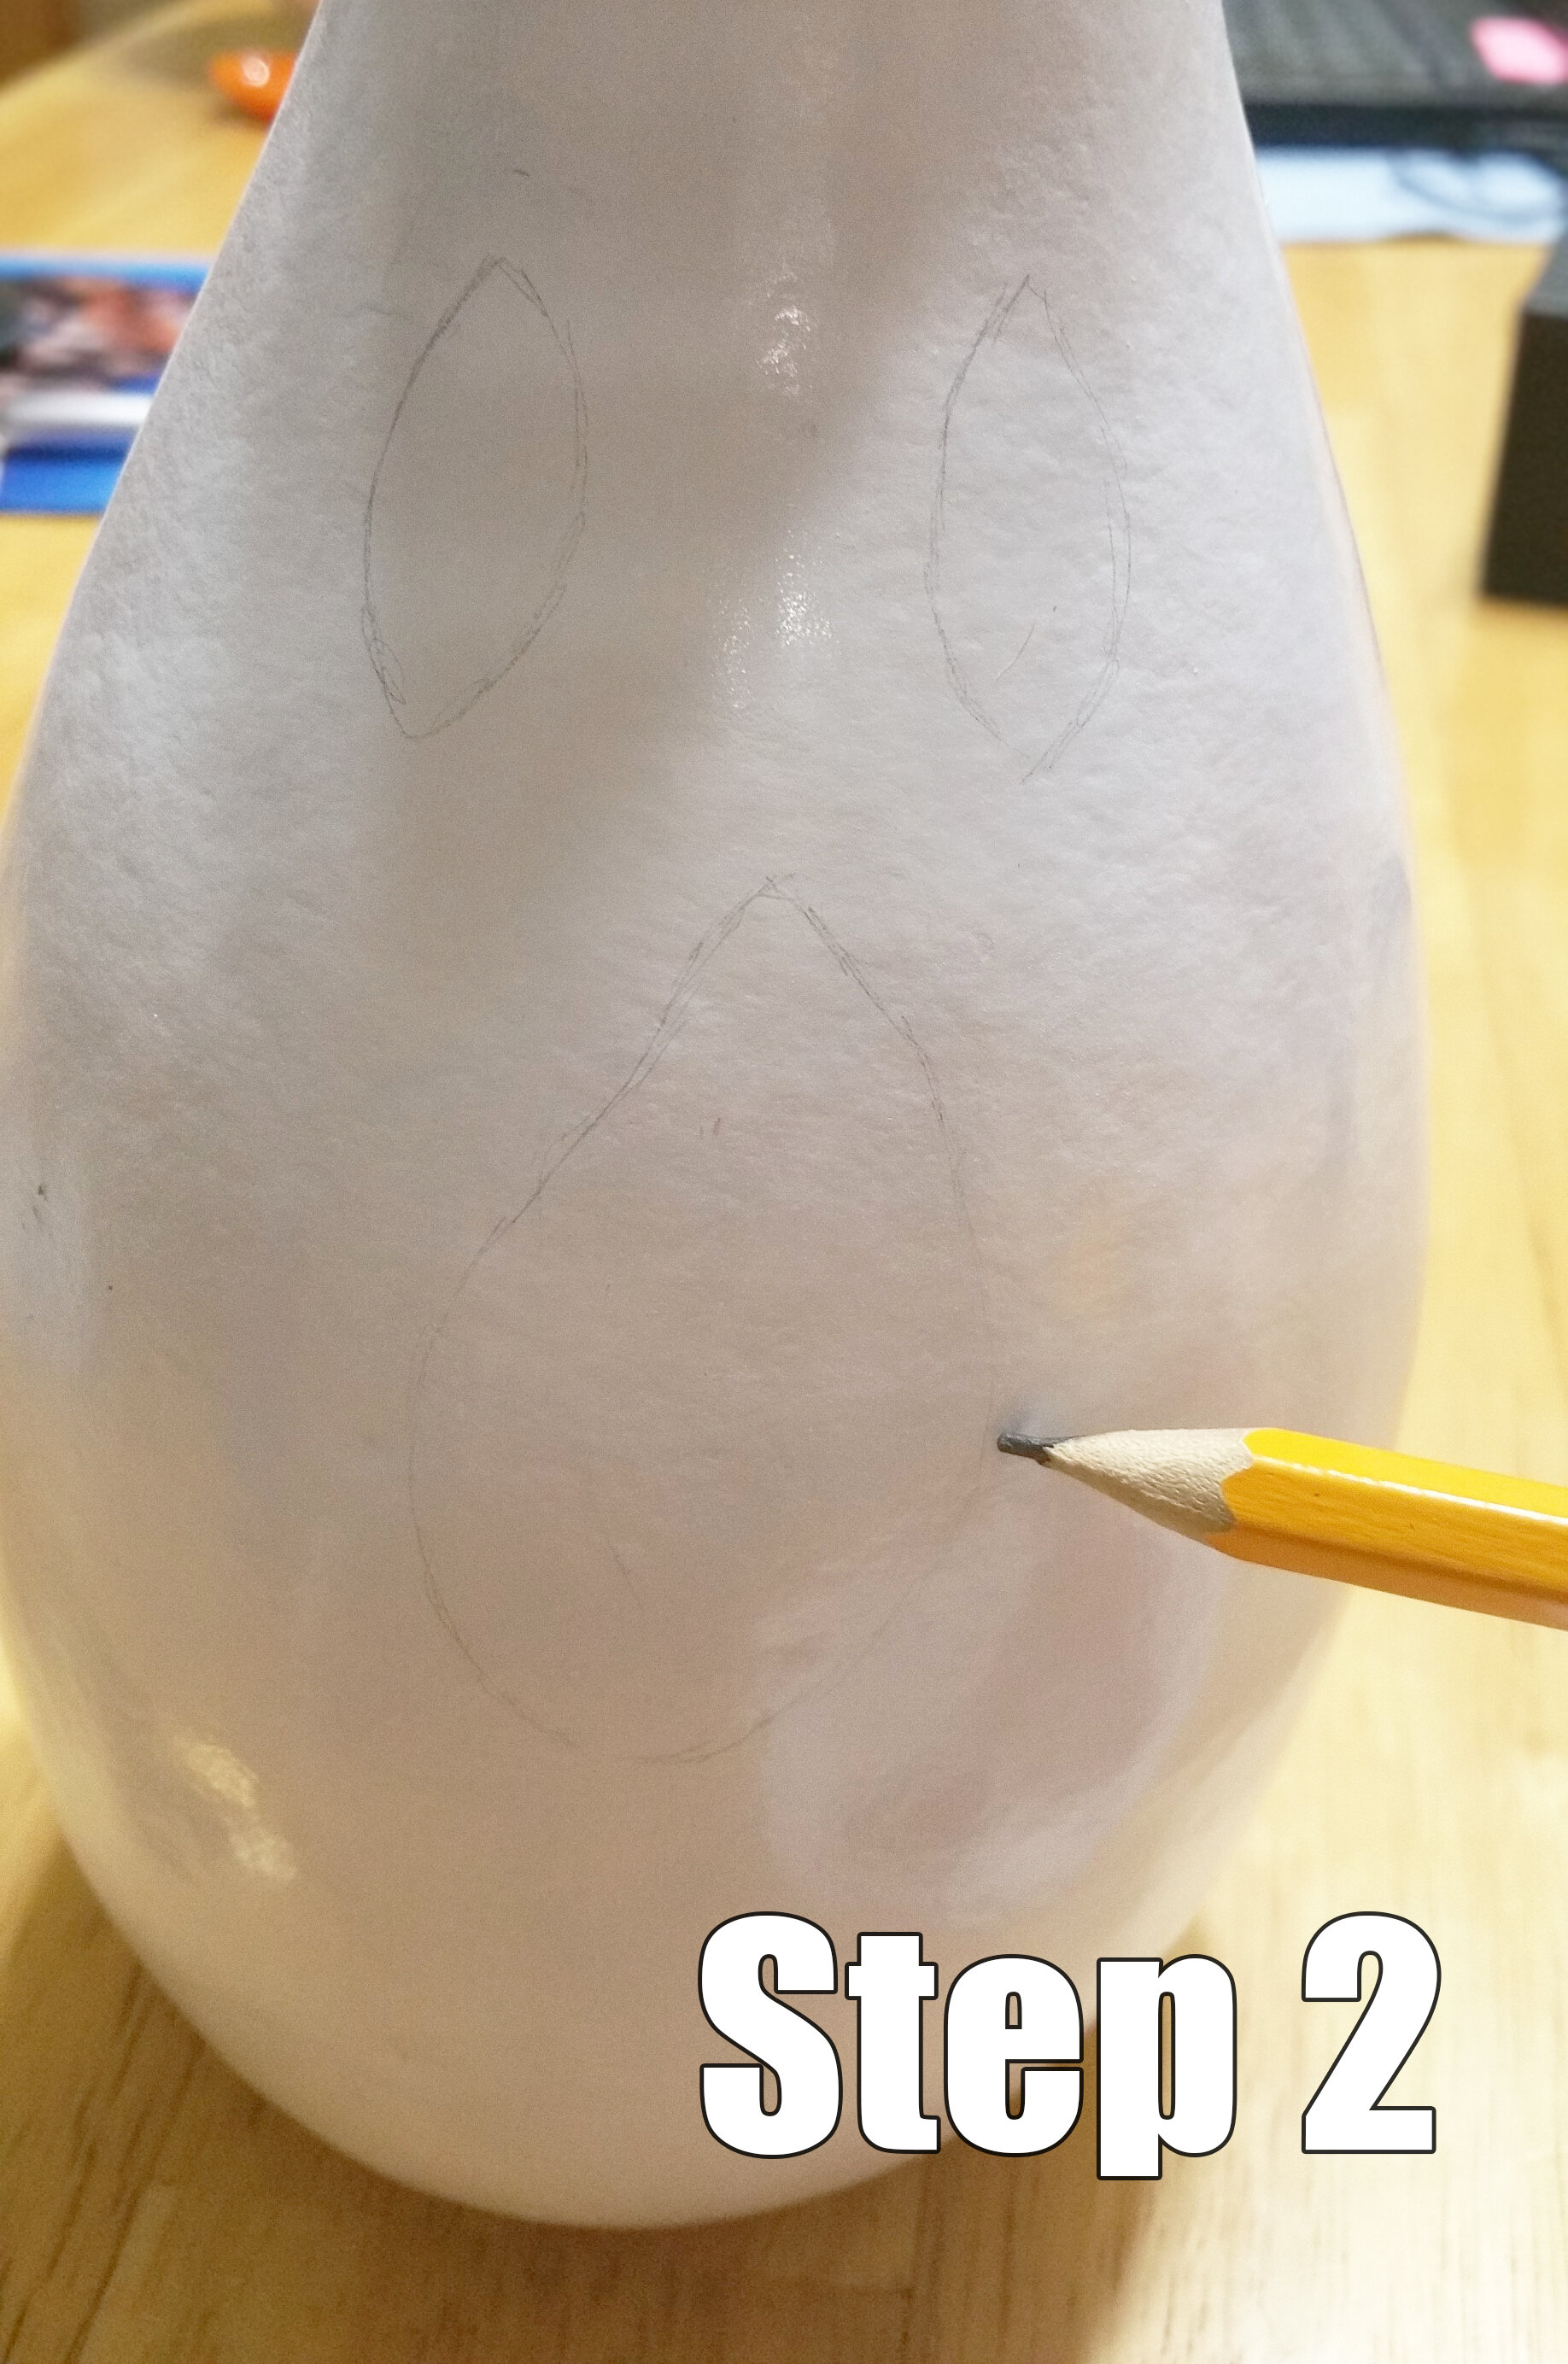
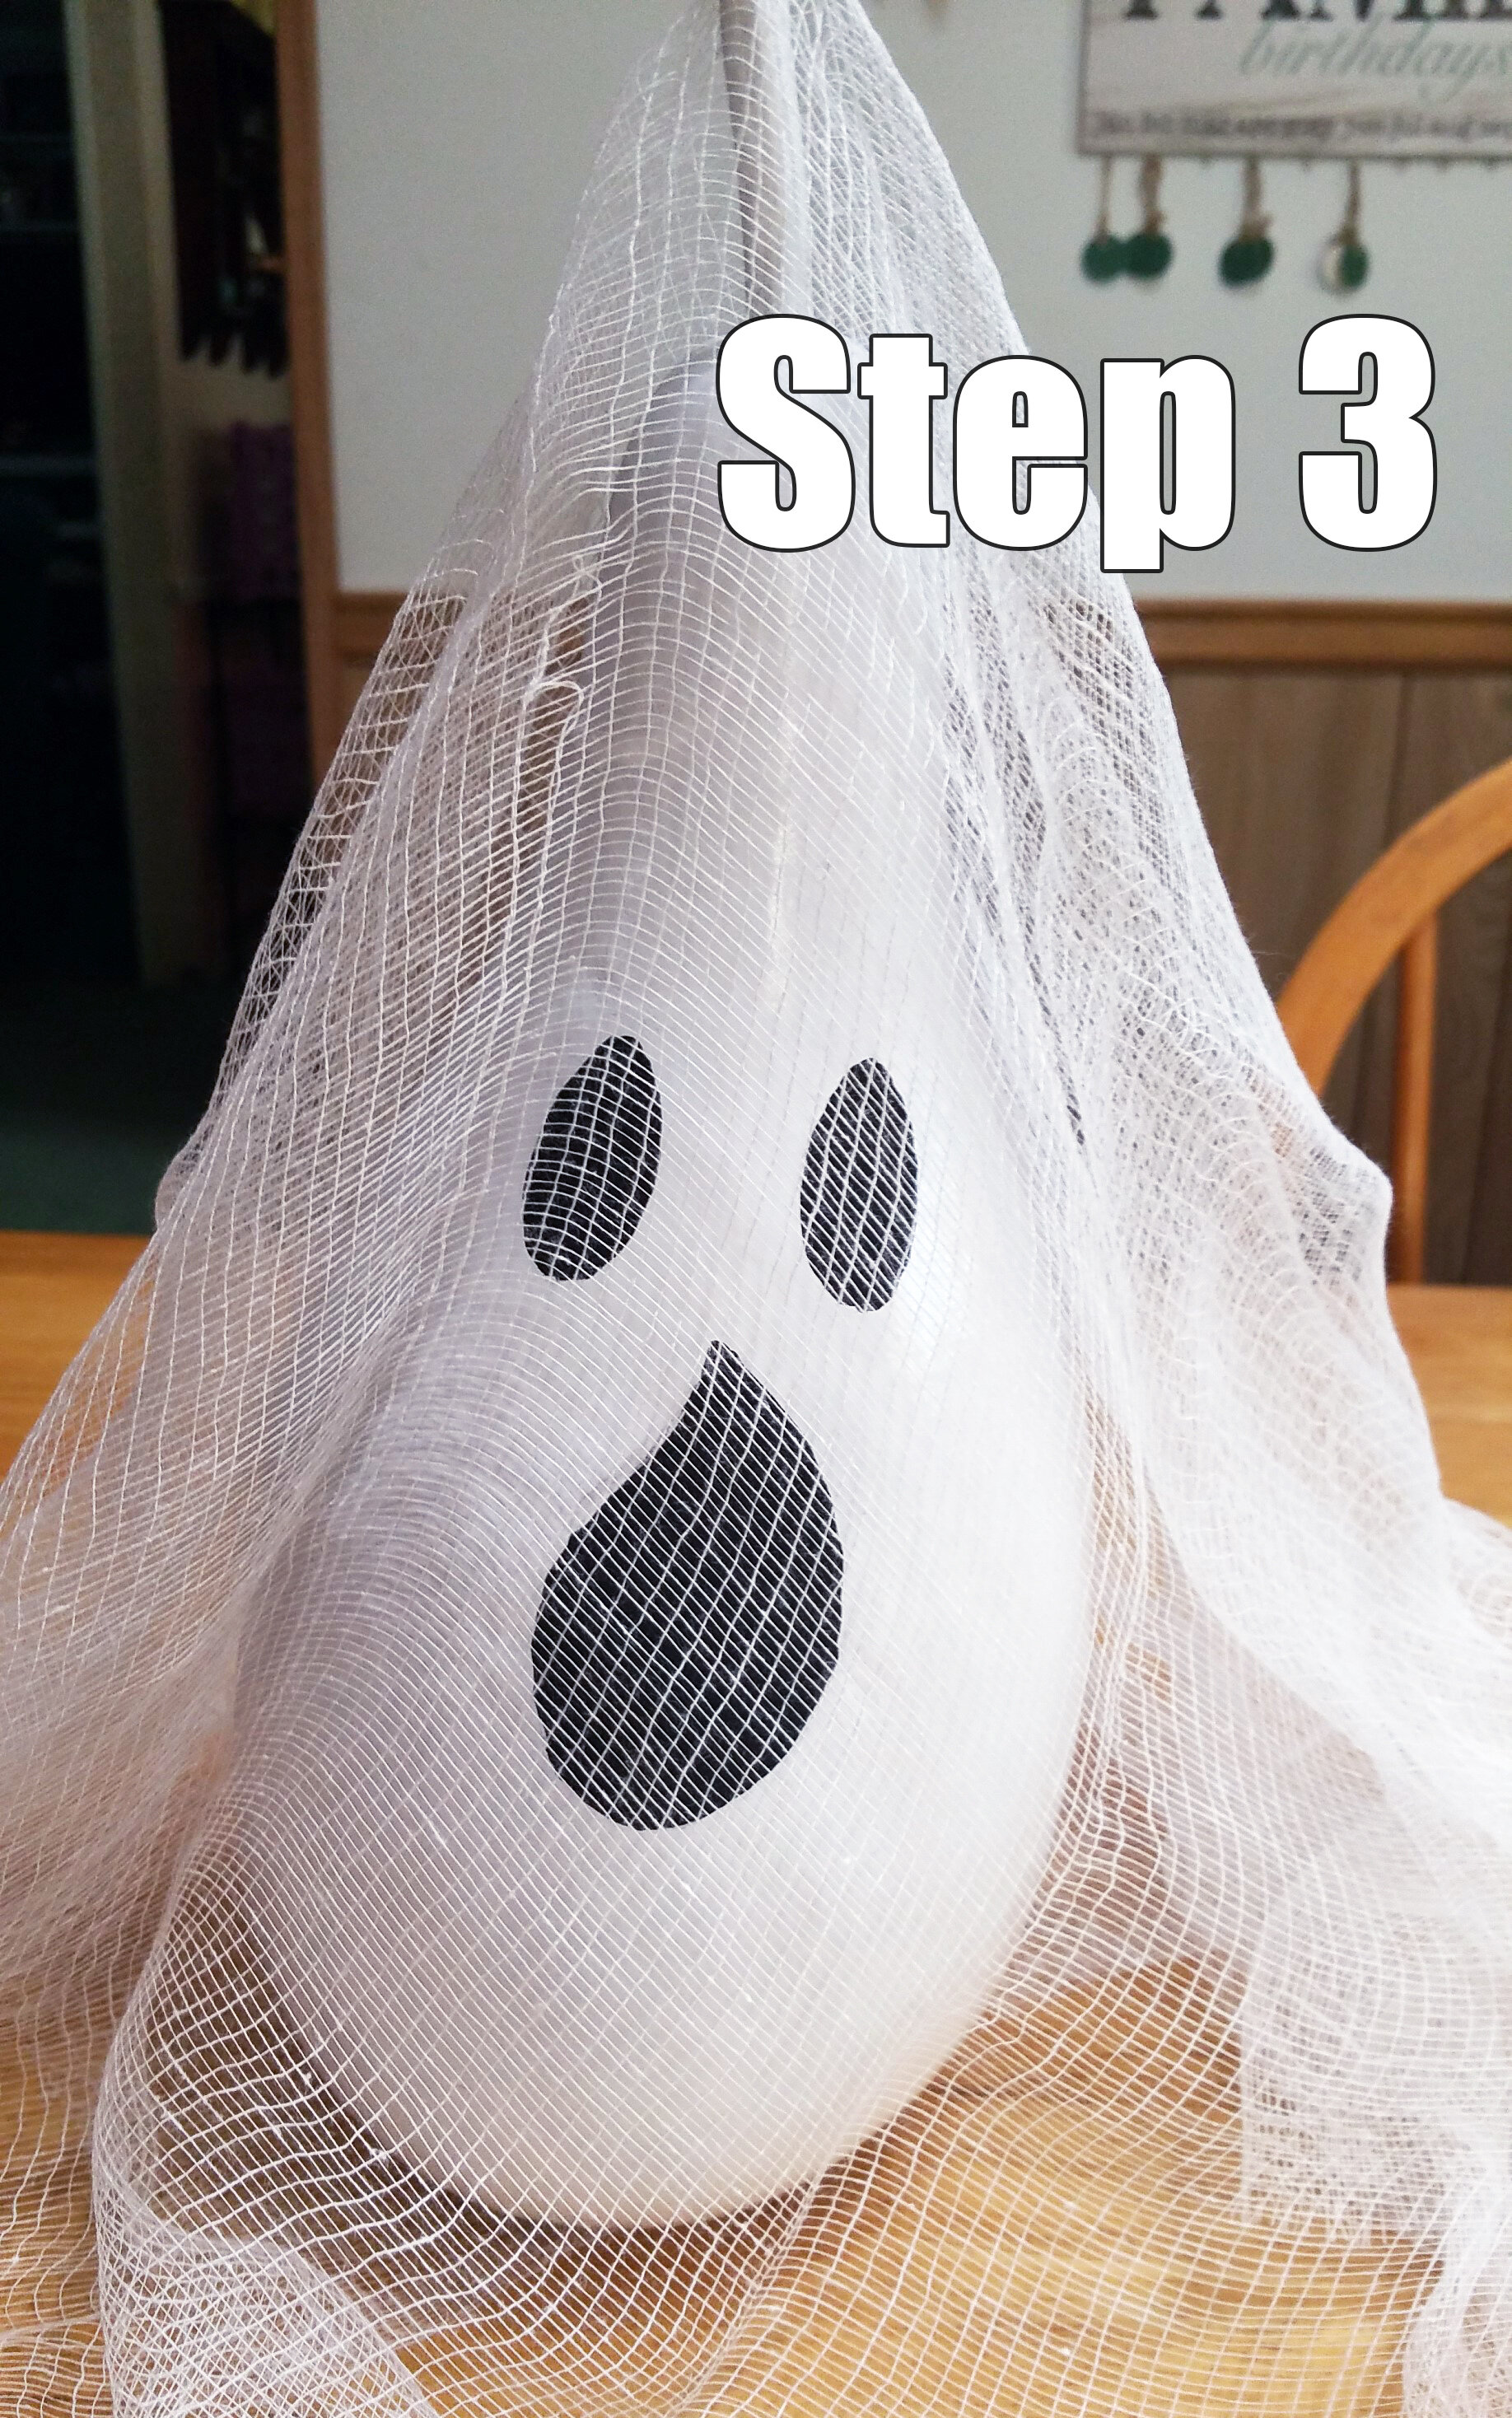
Ghostly Gourds
Tired of always having jack-o-lanterns as part of your décor? Switch it up by transforming a gourd into a ghost. Gourds are available in a variety of shapes and sizes, and can be found online and in stores. We used a dried penguin gourd for this craft.
What you need:
Gourd
White spray paint
Black acrylic paint
Paint brush
Cheesecloth
Step 1: Spray paint the entire gourd white and allow to dry completely. You may want to suspend it from a tree branch or clothes line so that it is painted evenly. Be sure to paint the stem as well.
Step 2: Add a face using the black acrylic paint.
Step 3: Once face is completely dried, drape the cheesecloth over the gourd to give it a ghostly appearance.
Your finished gourd can be used as part of a centerpiece, placed on a shelf, or set on porches next to pumpkins. Be sure to set your ghostly gourd in an area where it is protected from rain and other weather if you plan on using it outside.


Cousin Itt
Are you mysterious, spooky, or all together ooky? Then this DIY Cousin Itt from the Adams Family is a capital idea! Aside from the iconic Derby hat and sunglasses, all you need are a few tall tomato cages and long raffia table skirts. Place the first tomato cage upside down on the ground so that the large round opening is the base, and then stack the second cage on top. Use twist ties or twine to tie the staves together into a bunch. This will make the top gradually narrow and help form the base for the hat. Next, begin wrapping the table skirts around the cages starting from the bottom and going up so that the skirts are just brushing the ground. Once you reach the top, bunch the remaining layers of skirting together to create a rounded appearance similar in shape to a head and place the hat on top. Use some twist ties to affix the sunglasses and you’re finished.
Scarily Bright Ideas: Make baby What from the movie Adams Family Values by covering a foam head with a few brunette wigs and adding a pacifier.
Packing Tape Ghosts
Put the haunt back into your graveyard by making a ghost out of clear packing tape. This one-of-an-kind DIY project creates a realistic 3D silhouette that can be set amongst the tombstones or hung from a branch. For an even spookier effect, the finished form can be illuminated with battery operated light strings or a solar spot light. All you need is a dress form, foam head, plastic wrap, and clear packing tape. Place the foam head on top of the dress form and cover both with a layer of plastic wrap. Next, you will cover that with two to three layers of packing tape. Plastic sheeting can be used to make the bottom part of the dress for added effect. Now you can begin removing the tape form from the dress form. Carefully cut up one side of the form and gently remove the silhouette from the dress form, and then line up your pieces and tape them back together. If the finished piece will be displayed on the ground, use a thin PVC pipe or something similar to support it from the inside. This process can also be used to make hands (as pictured) or other body parts.
What spine tingling Halloween decorations have you made in the past? Tell us about them in the comments below, and be sure to follow our Facebook, Twitter, LinkedIn, Instagram, and Pinterest pages to keep up with the latest frightful DIY Halloween ideas.